Sunday, August 25, 2013

Confetti Cake Pops & Red Velvet Cake

It seems like it had been forever since I have wrote in my blog! All my weddings, bridal showers, bachelorette parties - you name it, have all come and gone as summer is slowly starting to come to a close. Which means holiday baking - my busiest time of year - is slowly creeping up. But hey we still have a couple months left so let's not go there.

This past weekend I made some desserts for my dear friend Jayme's birthday. I made confetti cake pops - a crowd favorite and also a red velvet cake. I have to admit that I think I need to take a cake class because it was definitely almost a Pinterest fail. What did I learn? I will share with you. But first let's talk about the cake pops! 

Confetti Cake Pops with Sprinkles
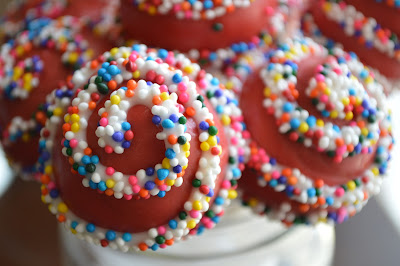
Confetti Cake Pops
I had a lot of fun making these rainbow cake pops. I simply used rainbow cake mix for the inside and then my usual 2-3 tbls french vanilla coffee creamer to make the inside of the cake pop. They will come out super moist but NOT overly sweet where you are forced into a sugar coma.
Rainbow Sprinkle Cake Pops
Rainbow swirls
After dipping them in chocolate and sticking them in the refrigerator to harder. I then put the left over melted chocolate into a Ziplock bag and cut the tiniest little corner away to make a pastry bag. To make the swirl I start on the top and then slowly but efficiently move my cake pop in a swirl fashion. Once you start getting to the sides is when you have to angle your cake pop at a 45 degree angle and you start to twirl your cake pop and NOT your hand. I hold my right hand with the chocolate in one place and twirl the cake pop stick in my left hand with my fingers.  
Rainbow Confetti Cake Pops with Sprinkles

Now if you are twirling it and you get "stuck" like you feel like you can twirl it in that direction anymore and need to re-grip, simply go back over the line you just created to cut of the flow of the chocolate and lift it away. Once you have re-gripped, start where you left off, once you have sprinkles on it you can't tell. 
Cakes Pops in a Mason Jar
After you are finished getting your chocolate swirl on there, hold your cake pop over a bowl and pour the sprinkles on. Making sure to cover the swirl completely top and bottom of the chocolate line you created. These non-pareils sprinkles do make a mess and fly everywhere so be careful. In fact, I found that it was easier to dump all the sprinkles into the bowl and then just use my hands to pick up some sprinkles and drizzle them over the chocolate. 
Once you have covered them with sprinkles, stick the cake pops back in the fridge and let them harden for about 5 minutes or so. And VOILA! Cake Pops! I do recommend that you DON'T leave them in the fridge for too long. If the inside gets to cold and you take them out where it is warm (since it is still summer) they will "sweat" and get soft and kind of mushy. Keep them in a cooler place in your house and in a tupperware container. They should be ok. 

NOTE: If you want your cake pops to stand up right like mine, I went to the craft store and bought a cube of styrofoam and then just shove the cake pop sticks in them to make holes and I keep that in my fridge throughout the whole process. Otherwise if you want them to lay stick up then just put them on wax paper in the fridge. 

OK - so now back to this cake disaster of mine. It has been a long time since I have baked a cake. I like to make petite desserts like cupcakes and cake pops or cookies, you know, things that are easier to eat. But what is a birthday with out a cake!? I made a Red Velvet Cake for my girl friend and wanted to make it have flowers all around it using a 1M Wilton Tip, you know the kind you see all over Pinterest. Well what I learned is that Cream Cheese Frosting does NOT frost like butter cream frosting. 
Red Velvet Cake with Flowers
Technically the cream cheese frosting was made with half cream cheese and half butter cream but in nature it is MUCH softer. The cake turned out all right and it still tasted just fine I thought. 
I guess it turned out ok.

The Birthday Girl
And I think the birthday girl still had a good time. But for next time, I better enroll in a cake class.

Thursday, August 8, 2013

Peachy Keen

I love going down to the local farmer's market - especially when the weather is so lovely out this time of year. I accidentally got there a little bit before they were technically open, but I was on a mission to get some beautiful flowers!
On my search, I saw one booth sampling some peaches. They were the most flavorful and juiciest peaches I have ever had! I picked up a pint of them and thought - I need to make peach cobbler! And it just so happens that the farmer had HIS own recipe for it. So homeward I went with my flowers and my peaches!

First you cut up the peaches in thin slices and fill a glass pie dish like so. Bake them for 10 minutes at 425 degrees.
Peach Cobbler Step One
Prep your crumble! (See ingredients/directions below.) Once your crumble is done your peaches should also be done cooking. and it should turn out something like this:
My Finished Peach Cobbler
I always have the bad habit of filling my dishes too much and so some of the juice seeped over and spilled in my oven. Next time I need to remember to put something under to prevent from it spilling and for easy clean up.

My cobbler was done and my flowers in a vase! Now all you need to do is add some vanilla ice cream and you have a delicious summer peach cobbler.
My Farmer's Market Flowers and Peach Cobbler

NOTE: Farmer's market peaches are SOOOOO much better than store bought. If you are attempting this recipe I HIGHLY recommend you find the nearest farmer's market. I had a couple peaches in my refrigerator from the store and I did a side by side taste comparison....the farmer's market peaches were leagues beyond store bought!

Bill's Fruits Fabulous Peach Cobbler
3-6 peaches (3 large or 6 small should be enough to fill you pie dish) cut into thin wedges
1/4 cup sugar
1 tablespoon fresh lemon juice
1 teaspoon cornstarch
* sub in one nectarine to enhance the flavor (optional)

Biscuit topping
1 cup flour
1/2 cup sugar
1 teaspoon baking powder
1/2 teaspoon salt
3/4 stick cold butter (6 tablespoons)
1/4 cup boiling water

Cook Peaches:
Preheat oven to 425 degrees
Toss peaches with sugar, lemon juice and corn starch in a glass pyrex dish and bake for 10 minutes

Make topping will peaches cook:
Stir together all dry ingredients
Cut butter into thin slices and mix with a pastry cutter or a fork to make course meal.
Stir in the water, little by little and mix until combined and you now have a wet mixture.

Remove peaches from the oven and drop spoonfuls of topping over them. Bake in the middle of oven until topping is golden brown about 20-25 minutes.

Sunday, August 4, 2013

Just Keep Swimming - Kolton's 4th Birthday

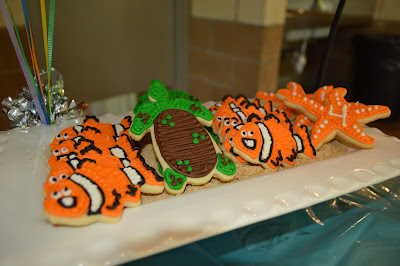
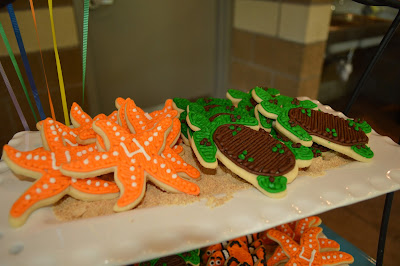
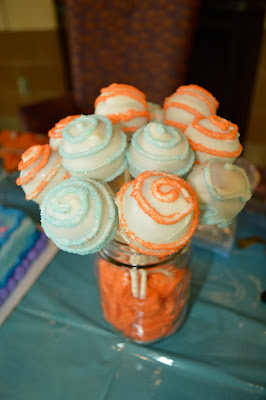
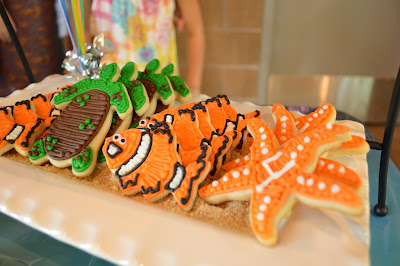
Just keep swimming...swimming... swimming... I love Finding Nemo the movie!!  And this year my little brother Kolton wanted a Nemo themed birthday party. Of course I was inspired by the endless possibilities for an "under the sea" type party fueled by Pinterest. BUT - we let the birthday boy pick and he decided on Nemo, the Turtle and a Starfish shaped cookie cutter as well as swirly, sparkly cake pops - chocolate flavored - DUH big sis.

Here are some pictures from the little man's treats and the party.
Mr. Birthday Boy! 
Finding Nemo Sugar Cookies
Nemo, Turtle and Starfish Cookies

Starfish and Turtle Sugar Cookies
More Starfish and Turtle Cookies
Cake Pops
Sparkly Swirl Cake Pops

Finding Nemo Themed Cookies
Just Keep Swimming

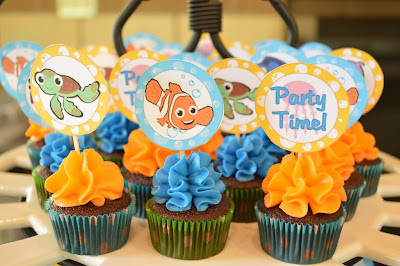
Finding Nemo Cupcake Toppers
Chocolate with Vanilla Buttercream Cupcakes 
These cupcake toppers I was able to print directly off the internet. I then cut them out and took a toothpick and some tape and VOILA! Super easy to make and they were FREE. No need to go hunting store to store looking for them now or looking on Etsy and paying for shipping. Don't stress yourself out. GOOGLE IT and ye'shall find.
Nemo Cupcake Toppers
Kolton's had a lot of fun at his birthday and all the kids loved the treats.... even the adults! Thanks for stopping by!