It seems like it had been forever since I have wrote in my blog! All my weddings, bridal showers, bachelorette parties - you name it, have all come and gone as summer is slowly starting to come to a close. Which means holiday baking - my busiest time of year - is slowly creeping up. But hey we still have a couple months left so let's not go there.
This past weekend I made some desserts for my dear friend Jayme's birthday. I made confetti cake pops - a crowd favorite and also a red velvet cake. I have to admit that I think I need to take a cake class because it was definitely almost a Pinterest fail. What did I learn? I will share with you. But first let's talk about the cake pops!
 |
| Confetti Cake Pops |
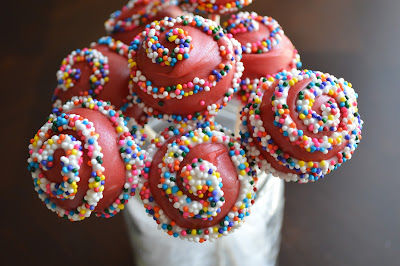
I had a lot of fun making these rainbow cake pops. I simply used rainbow cake mix for the inside and then my usual 2-3 tbls french vanilla coffee creamer to make the inside of the cake pop. They will come out super moist but NOT overly sweet where you are forced into a sugar coma.
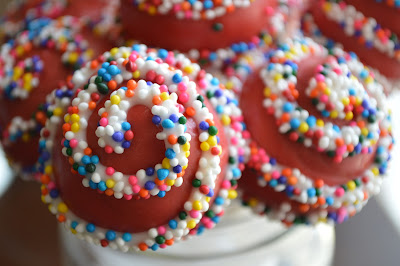 |
| Rainbow swirls |
After dipping them in chocolate and sticking them in the refrigerator to harder. I then put the left over melted chocolate into a Ziplock bag and cut the tiniest little corner away to make a pastry bag. To make the swirl I start on the top and then slowly but efficiently move my cake pop in a swirl fashion. Once you start getting to the sides is when you have to angle your cake pop at a 45 degree angle and you start to twirl your cake pop and NOT your hand. I hold my right hand with the chocolate in one place and twirl the cake pop stick in my left hand with my fingers.
Now if you are twirling it and you get "stuck" like you feel like you can twirl it in that direction anymore and need to re-grip, simply go back over the line you just created to cut of the flow of the chocolate and lift it away. Once you have re-gripped, start where you left off, once you have sprinkles on it you can't tell.
After you are finished getting your chocolate swirl on there, hold your cake pop over a bowl and pour the sprinkles on. Making sure to cover the swirl completely top and bottom of the chocolate line you created. These non-pareils sprinkles do make a mess and fly everywhere so be careful. In fact, I found that it was easier to dump all the sprinkles into the bowl and then just use my hands to pick up some sprinkles and drizzle them over the chocolate.
Once you have covered them with sprinkles, stick the cake pops back in the fridge and let them harden for about 5 minutes or so. And VOILA! Cake Pops! I do recommend that you DON'T leave them in the fridge for too long. If the inside gets to cold and you take them out where it is warm (since it is still summer) they will "sweat" and get soft and kind of mushy. Keep them in a cooler place in your house and in a tupperware container. They should be ok.
NOTE: If you want your cake pops to stand up right like mine, I went to the craft store and bought a cube of styrofoam and then just shove the cake pop sticks in them to make holes and I keep that in my fridge throughout the whole process. Otherwise if you want them to lay stick up then just put them on wax paper in the fridge.
OK - so now back to this cake disaster of mine. It has been a long time since I have baked a cake. I like to make petite desserts like cupcakes and cake pops or cookies, you know, things that are easier to eat. But what is a birthday with out a cake!? I made a Red Velvet Cake for my girl friend and wanted to make it have flowers all around it using a 1M Wilton Tip, you know the kind you see all over Pinterest. Well what I learned is that Cream Cheese Frosting does NOT frost like butter cream frosting.
 |
| Red Velvet Cake with Flowers |
Technically the cream cheese frosting was made with half cream cheese and half butter cream but in nature it is MUCH softer. The cake turned out all right and it still tasted just fine I thought.
I guess it turned out ok.
 |
| The Birthday Girl |
And I think the birthday girl still had a good time. But for next time, I better enroll in a cake class.


