Friday, September 20, 2013

FALL is Coming...

I am in big time denial. I just don't want summer to end quite yet! I was convinced that summer was still trying to hang around but there is no fooling Mother Nature and what she says GOES. Here is the proof that I found today that fall is coming, in addition to the fact that it now gets dark by 7:30pm and I have to remember to turn on my head lights when I am driving around.

That is the glorious thing about the Pacific Northwest. In the middle of summer it will stay light out until 10pm.

I guess there are SOME good things that do come with fall. Cozy sweaters, Pumpkin Spice Lattes, boots and falling leaves. And my Fall Pinterest Board (SEE HERE) is BLOWING up with inspiring fall themes.  

And on that Pinterest board I had a pin for a Chocolate Pumpkin Spice bundt cake from this awesome blog, Chocolate, Chocolate and More Chocolate. Naturally, I am a fan. Check out the blog HERE for the recipe! 

So there was just one little problem standing in my way of this confection and me...a bundt pan. I was just in William Sonoma the other day admiring the REALLY nice bake-ware section they had. TONS of bundt pans, but they were all around $20-30 bucks a pop. I made a mental note and left with just a high quality cooking spray, this stuff works AMAZING! Go get some it is only $10 at William Sonoma. 
Say NO to PAM! Buy Me Instead!
 
So here I am ingrediants and all but no bundt pan. Fortunately I live down the street from a Value Village and I decided to pop in. Within 5 minutes I find this little GEM. In brand new condition and for $5.99. SCORE! Even looks like a crown!
Gotta Love Value Village!

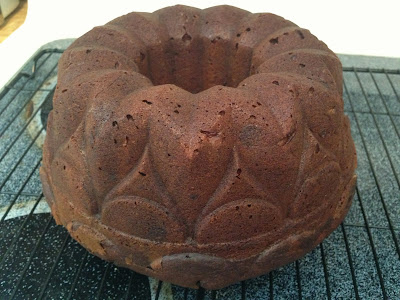
I got out my recipe and proceeded to BAKE! Now I know that my oven is a fast cooker to begin with so I set the timer to 45 minutes according to the recipe and it was definitely not done cooking in the middle, still very gooey when I tested it. But the bottom of the cake was perfectly cooked and I didn't want to come out uneven. The solution - tin foil. I literally just cut a piece and set it over the top of the bundt and 10 minutes later, it was done and not burnt. 
MMMmmmm....perfecto
Now you have to let it cool before flipping it on to the cooling rack. And sure enough the non stick spray did the job because that little cake popped right out of there no problem! 
Chocolate Pumpkin Bundt Cake
The bundt cake
 
Now once it is cooled the recipe said you can either sprinkle powdered sugar on it OR frost it...when in rome FROST IT. I just so happen to have a little bit of left over butter cream frosting in my fridge from last weekend so I proceeded to pull that out. I then also had a little bit left of a bag of white chocolate chips. I melted the white chocolate chips over a double boil on the stove and added it to the butter cream to make...wait for it....WHITE CHOCOLATE BUTTER CREAM...yup you guessed it. 
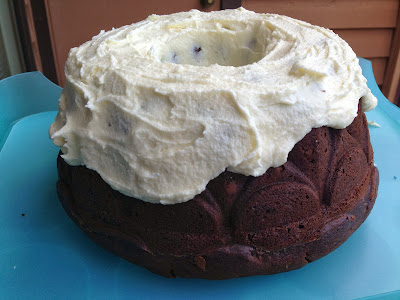
Chocolate Pumpkin Spice Bundt Case
The Finished Product
Well if you can't beat them, join them. HAPPY FALL FRIENDS!


Monday, September 16, 2013

Life is Like A Box of Chocolates - Truffle Class

I had to name this after the Forest Gump because that is all I could think about while taking the class!

My best friend got me a gift card for my birthday to my favorite baking shop, Dawn's Candy and Cake in Bothell. They offer a wide variety of classes you can take and if there is something that you want to learn how to do but is not on the schedule you can request it! This is also where I took my cake pop class!!

They also have an AWESOME supply of just about anything you need related to baking and I am talking about all the weird little stuff too that maybe you haven't heard of. And all of the prices are really reasonable compared to Michael's.

I am always looking for baking enthusiasts friends to join me when I do classes. I was at a bridal shower when I discovered a friend lived by me and liked to bake so I invited her to come along! This is Erin - say (hi Erin!)
My Partner in Crime!

In this class we learned how to temper chocolate which is a process of heating and cooling high quality chocolate into truffles, candy bars, you name it. This is a technique that is taught in culinary school. Dawn the owner and instructor, told me that she had culinary students come to her class and said she made it so much easier than in their school lessons.

Filling the Chocolate Shells with Flavored Ganache 
I have melted and shaped chocolate for years so I was up for a challenge! I am not going to describe in detail the whole process because honestly, I only understood bits and pieces myself. But the end result was great AND the best part was we HAD to eat chocolate all night.

In Deep Concentration


Filling Bottles of Tasty Ganache

Now Thats A Big Candy Bar!
Here is a picture above of the chocolate that we were tempering! I secretly wanted to get a picture of me holding it and trying to take a bite.!

Erin Filling Her Truffles

Cheesecake Truffles
Cheesecake Truffles

Flavored Chocolate Truffles
Baileys and Rum Truffles

Peanut Butter Truffles

Peppermint Mocha Truffles
Peppermint Mocha Truffles with Disco Dust! 

Coconut Truffles
Coconut Truffles

English Toffee Truffles

Pumpkin Spice Truffles. PSL
Pumpkin Spice Truffles

Coffee Truffles
Coffee Truffles

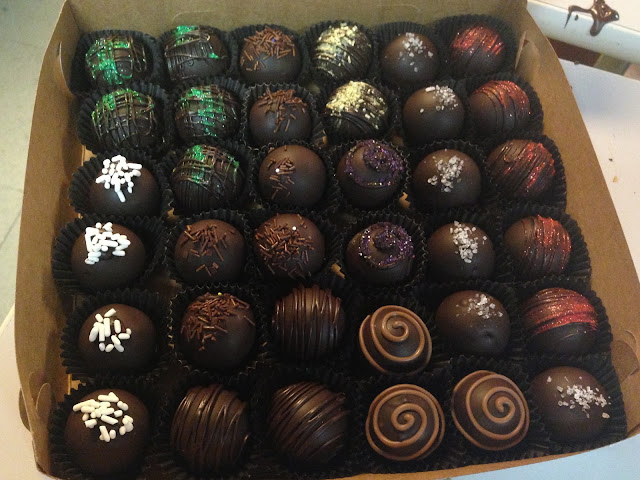
Chocolate Truffle Box
The End Result - Truffle Box
Here are my beautiful creations! At this point in time I had been in the class for 4 hours and it was pushing after 10pm. I was tried and was just trying to finish them as fast as I could! I forgot I also made salted caramel flavor which is my favorite!

Monday, September 9, 2013

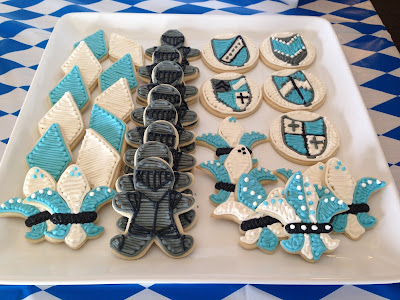
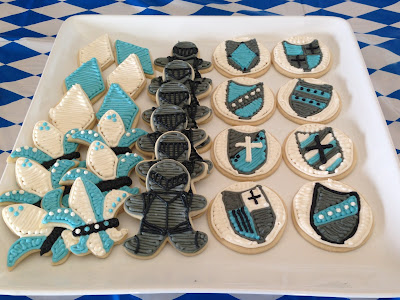
Medieval Themed Cookies

I had a couple big cookie projects this weekend. I actually made cookies for a corporate gathering this past friday. My uncle is the General Manager for Mass Mutual Financial (click the link to check him out hehe). Anyways, they were having their annual picnic outing and I was asked if I was interested in making themed cookies for them. Naturally I was.

I have to say that these cookies took some thought and creativity to them. Usually if I don't have a particular cutter, I can go to Etsy.com and buy some from my favorite shop - the cookie cutter guy, check him out great products!!  However, in this case it was a little bit shorter notice so I couldn't order some of the shapes that I wanted.

For example, a shield cookie cutter or a sword cookie cutter would have been really cool to frost. But I had to get a little creative which means PINTEREST to the rescue. I also found on Pinterest how to turn a gingerbread man into a knight. I also ended up using a plain circle to make a shield.

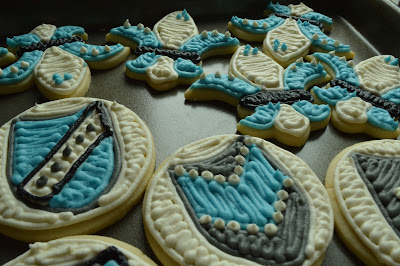
Shield Cookie with Piped Butter Cream Frosting

I was at my local craft store and I lucked out when I saw the Fleur De Lis cookie cutter! I thought to myself, thats kind of medieval right? I think this one turned out to be my favorite and would be really cute for future parties like Mardi Gras!

Fleur De Lis Sugar Cookie
Fleur De Lis Cookie Cutter
The party really lucked out weather wise. The night before we were having TERRIBLE thunder and lightning storms which is so uncommon. The sun did come out and shine for the party though and the cookies received good feedback to me. Check them out!


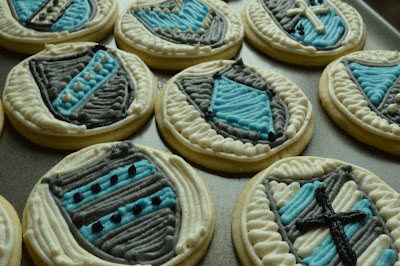
Shield Cookies 
The whole time I was frosting the shield cookies I couldn't help but think about one of my favorite shows....GAME OF THRONES. Each shield is a different pattern and it made me think of all the different clans and townships they would represent. I know it is silly but sometimes you have to exercise your imagination!

Shield Cookies
Fleur De Lis Cookies
Medieval Shield Cookies
Game of Thrones Anyone?

The diamond shapes were meant to match the table clothes which were the blue and white Oktoberfest pattern you see in the background. The below are the finished product cookie platters. 

Medieval Themed Cookies
Medieval Cookies

Medieval Themed Cookie Platter
Medieval Cookie Platter
Of all the cookies I have made thus far, I would say this project challenged me the most and I was a little nervous for the finished product.

Sunday, September 8, 2013

Grandma's 90th Birthday Celebration!

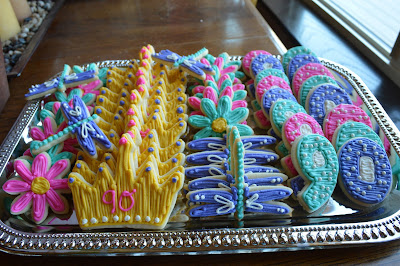
This year my boyfriend's grandma, Phyllis, turned 90 years old. To celebrate, the family threw a surprise birthday party. She was surprised to say the least and it was a beautiful day for a party! All the kids, grandkids and great-grandkids made it out for the party and it was really special for her and everyone.
The Birthday Girl Arrives!
Naturally I had to make some cookies. The only problem was the drive. From our house it is about 2-2.5 hours east and over the mountains to the little town of Wenatchee. I knew there was no way I could get the cookies over there in one piece. The other difficulty is the fact that his parents live in his grandma's house (long story) and because it was a surprise, I didn't want her to see them! I decided that I had to frost the cookies over in Wenatchee... but where?

Don't Mess With the BDAY Girl

Thankfully our friend's Kyle and Becky came to the rescue and let me use their kitchen to frost the cookies and let them set over night! Big shout out to Becky for letting me do that on such short notice. It worked out perfectly! I made the cookies the night before we left and then frosted them the night before the party. Here are some pictures of the treats and the birthday girl!

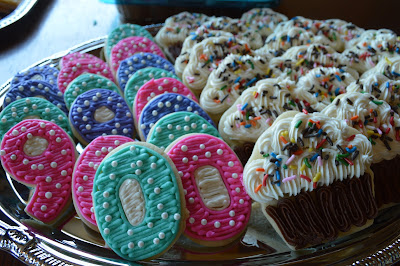
90 Birthday, Dragon Fly Cookie, Flower Cookies, Daisy Cookies
The Cookie Platter


The Big 9-0

Dragon Fly Sugar Cookies
Dragonfly Cookies

 I love this little dragonfly cookie cutter. The only difficulty with this cookie cutter is the tail. It is VERY fragile. I made extra's just in case and I ended up breaking about half of them.

Crown Tiara Sugar Cookies
90th Birthday Crown Cookies

 I almost didn't do the crown but I am glad I did because the birthday girl was wearing her tiara and it was too perfect!
Daisy Flower Sugar Cookies
Daisy Flowers and Dragon Fly Cookies

The daisy sugar cookies were one of my new cutters and I was so excited to use this one. I loved the bright colors and the cookie is about 1-2" which is the perfect "cookie" size in my opinion!

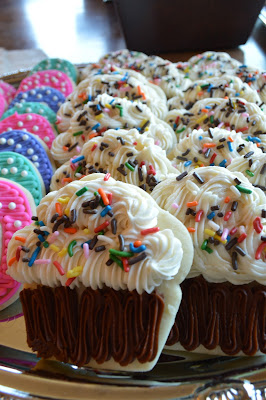
Cupcake Sugar Cookie
Cupcake Sugar Cookies (My First Cutter)

The cupcake was the first cookie cutter from a class I took back in the spring, and what started my passion and hobby of baking and frosting cookies. Without that class, I would not be where I was today! 

Birthday Sugar Cookie Platter
The Other Cookie Platter
 Happy birthday to Grandma!

Sunday, August 25, 2013

Confetti Cake Pops & Red Velvet Cake

It seems like it had been forever since I have wrote in my blog! All my weddings, bridal showers, bachelorette parties - you name it, have all come and gone as summer is slowly starting to come to a close. Which means holiday baking - my busiest time of year - is slowly creeping up. But hey we still have a couple months left so let's not go there.

This past weekend I made some desserts for my dear friend Jayme's birthday. I made confetti cake pops - a crowd favorite and also a red velvet cake. I have to admit that I think I need to take a cake class because it was definitely almost a Pinterest fail. What did I learn? I will share with you. But first let's talk about the cake pops! 

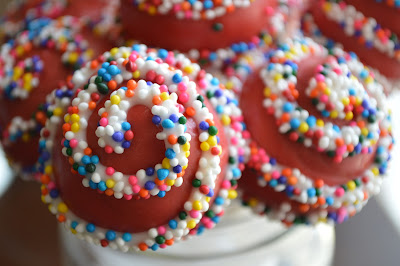
Confetti Cake Pops with Sprinkles
Confetti Cake Pops
I had a lot of fun making these rainbow cake pops. I simply used rainbow cake mix for the inside and then my usual 2-3 tbls french vanilla coffee creamer to make the inside of the cake pop. They will come out super moist but NOT overly sweet where you are forced into a sugar coma.
Rainbow Sprinkle Cake Pops
Rainbow swirls
After dipping them in chocolate and sticking them in the refrigerator to harder. I then put the left over melted chocolate into a Ziplock bag and cut the tiniest little corner away to make a pastry bag. To make the swirl I start on the top and then slowly but efficiently move my cake pop in a swirl fashion. Once you start getting to the sides is when you have to angle your cake pop at a 45 degree angle and you start to twirl your cake pop and NOT your hand. I hold my right hand with the chocolate in one place and twirl the cake pop stick in my left hand with my fingers.  
Rainbow Confetti Cake Pops with Sprinkles

Now if you are twirling it and you get "stuck" like you feel like you can twirl it in that direction anymore and need to re-grip, simply go back over the line you just created to cut of the flow of the chocolate and lift it away. Once you have re-gripped, start where you left off, once you have sprinkles on it you can't tell. 
Cakes Pops in a Mason Jar
After you are finished getting your chocolate swirl on there, hold your cake pop over a bowl and pour the sprinkles on. Making sure to cover the swirl completely top and bottom of the chocolate line you created. These non-pareils sprinkles do make a mess and fly everywhere so be careful. In fact, I found that it was easier to dump all the sprinkles into the bowl and then just use my hands to pick up some sprinkles and drizzle them over the chocolate. 
Once you have covered them with sprinkles, stick the cake pops back in the fridge and let them harden for about 5 minutes or so. And VOILA! Cake Pops! I do recommend that you DON'T leave them in the fridge for too long. If the inside gets to cold and you take them out where it is warm (since it is still summer) they will "sweat" and get soft and kind of mushy. Keep them in a cooler place in your house and in a tupperware container. They should be ok. 

NOTE: If you want your cake pops to stand up right like mine, I went to the craft store and bought a cube of styrofoam and then just shove the cake pop sticks in them to make holes and I keep that in my fridge throughout the whole process. Otherwise if you want them to lay stick up then just put them on wax paper in the fridge. 

OK - so now back to this cake disaster of mine. It has been a long time since I have baked a cake. I like to make petite desserts like cupcakes and cake pops or cookies, you know, things that are easier to eat. But what is a birthday with out a cake!? I made a Red Velvet Cake for my girl friend and wanted to make it have flowers all around it using a 1M Wilton Tip, you know the kind you see all over Pinterest. Well what I learned is that Cream Cheese Frosting does NOT frost like butter cream frosting. 
Red Velvet Cake with Flowers
Technically the cream cheese frosting was made with half cream cheese and half butter cream but in nature it is MUCH softer. The cake turned out all right and it still tasted just fine I thought. 
I guess it turned out ok.

The Birthday Girl
And I think the birthday girl still had a good time. But for next time, I better enroll in a cake class.

Thursday, August 8, 2013

Peachy Keen

I love going down to the local farmer's market - especially when the weather is so lovely out this time of year. I accidentally got there a little bit before they were technically open, but I was on a mission to get some beautiful flowers!
On my search, I saw one booth sampling some peaches. They were the most flavorful and juiciest peaches I have ever had! I picked up a pint of them and thought - I need to make peach cobbler! And it just so happens that the farmer had HIS own recipe for it. So homeward I went with my flowers and my peaches!

First you cut up the peaches in thin slices and fill a glass pie dish like so. Bake them for 10 minutes at 425 degrees.
Peach Cobbler Step One
Prep your crumble! (See ingredients/directions below.) Once your crumble is done your peaches should also be done cooking. and it should turn out something like this:
My Finished Peach Cobbler
I always have the bad habit of filling my dishes too much and so some of the juice seeped over and spilled in my oven. Next time I need to remember to put something under to prevent from it spilling and for easy clean up.

My cobbler was done and my flowers in a vase! Now all you need to do is add some vanilla ice cream and you have a delicious summer peach cobbler.
My Farmer's Market Flowers and Peach Cobbler

NOTE: Farmer's market peaches are SOOOOO much better than store bought. If you are attempting this recipe I HIGHLY recommend you find the nearest farmer's market. I had a couple peaches in my refrigerator from the store and I did a side by side taste comparison....the farmer's market peaches were leagues beyond store bought!

Bill's Fruits Fabulous Peach Cobbler
3-6 peaches (3 large or 6 small should be enough to fill you pie dish) cut into thin wedges
1/4 cup sugar
1 tablespoon fresh lemon juice
1 teaspoon cornstarch
* sub in one nectarine to enhance the flavor (optional)

Biscuit topping
1 cup flour
1/2 cup sugar
1 teaspoon baking powder
1/2 teaspoon salt
3/4 stick cold butter (6 tablespoons)
1/4 cup boiling water

Cook Peaches:
Preheat oven to 425 degrees
Toss peaches with sugar, lemon juice and corn starch in a glass pyrex dish and bake for 10 minutes

Make topping will peaches cook:
Stir together all dry ingredients
Cut butter into thin slices and mix with a pastry cutter or a fork to make course meal.
Stir in the water, little by little and mix until combined and you now have a wet mixture.

Remove peaches from the oven and drop spoonfuls of topping over them. Bake in the middle of oven until topping is golden brown about 20-25 minutes.

Sunday, August 4, 2013

Just Keep Swimming - Kolton's 4th Birthday

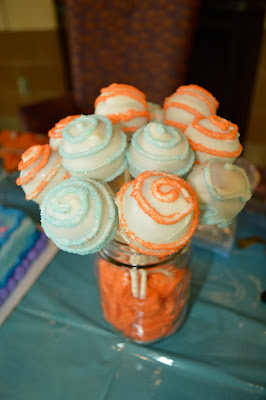
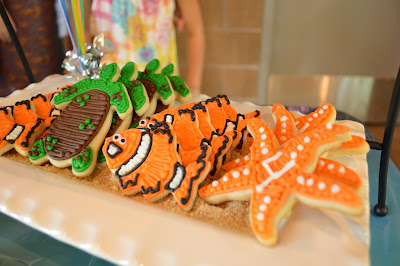
Just keep swimming...swimming... swimming... I love Finding Nemo the movie!!  And this year my little brother Kolton wanted a Nemo themed birthday party. Of course I was inspired by the endless possibilities for an "under the sea" type party fueled by Pinterest. BUT - we let the birthday boy pick and he decided on Nemo, the Turtle and a Starfish shaped cookie cutter as well as swirly, sparkly cake pops - chocolate flavored - DUH big sis.

Here are some pictures from the little man's treats and the party.
Mr. Birthday Boy! 
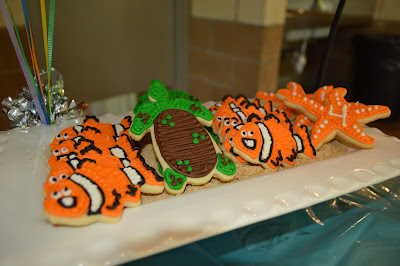
Finding Nemo Sugar Cookies
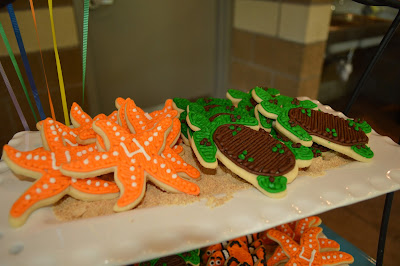
Nemo, Turtle and Starfish Cookies

Starfish and Turtle Sugar Cookies
More Starfish and Turtle Cookies
Cake Pops
Sparkly Swirl Cake Pops

Finding Nemo Themed Cookies
Just Keep Swimming

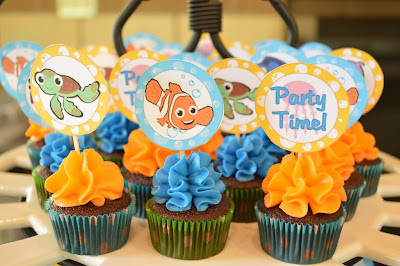
Finding Nemo Cupcake Toppers
Chocolate with Vanilla Buttercream Cupcakes 
These cupcake toppers I was able to print directly off the internet. I then cut them out and took a toothpick and some tape and VOILA! Super easy to make and they were FREE. No need to go hunting store to store looking for them now or looking on Etsy and paying for shipping. Don't stress yourself out. GOOGLE IT and ye'shall find.
Nemo Cupcake Toppers
Kolton's had a lot of fun at his birthday and all the kids loved the treats.... even the adults! Thanks for stopping by!